Use this when your universe needs its own map — a hand-drawn fantasy continent, a sci-fi system chart, a fictional city street grid, anything that doesn’t belong on OpenStreetMap. By the end, your image is registered as a custom map, places have markers on it, and you know how to extend with drilldown regional maps if your world needs multi-scale geography.
What you’ll need#
- A map image file (PNG, JPG, or WebP) somewhere in your vault.
- A universe note to scope the map to. See I want to create a fictional universe. Optional, but recommended — it lets places filter automatically by universe rather than coordinate match.
- An idea of which coordinate system fits: Geographic (lat/lng — best for historical real-world maps) or Pixel (image pixel coordinates — best for hand-drawn fantasy maps).
Steps#
1. Open the Map Creation Wizard#
Control Center → Maps tab → Create Custom Map. Four steps follow.
2. Step 1 — Select the image#
Browse your vault for the map image. A preview appears so you can confirm the right file.
3. Step 2 — Configure the map#
Fill in:
- Map name — display name (e.g., “Middle-earth”, “The Dying Earth”, “Coruscant”)
- Universe — link to your universe note (optional but recommended)
- Coordinate system — Geographic (lat/lng) or Pixel
- Bounds / dimensions — for Geographic: north / south / east / west bounds. For Pixel: image width and height in pixels.
4. Step 3 — Place markers (optional)#
Click anywhere on the map image to drop a place marker. Each click opens the Create Place modal so you can name and configure the place. Markers appear with the place name; drag to reposition; right-click to edit or remove.
You can skip this step entirely and add places later — useful when you want to set up the map first and seed it with places as your worldbuilding progresses.
5. Step 4 — Review and create#
Confirm the configuration. Click Create Map. The map note and any place notes you added are written to your configured folders.
6. Verify#
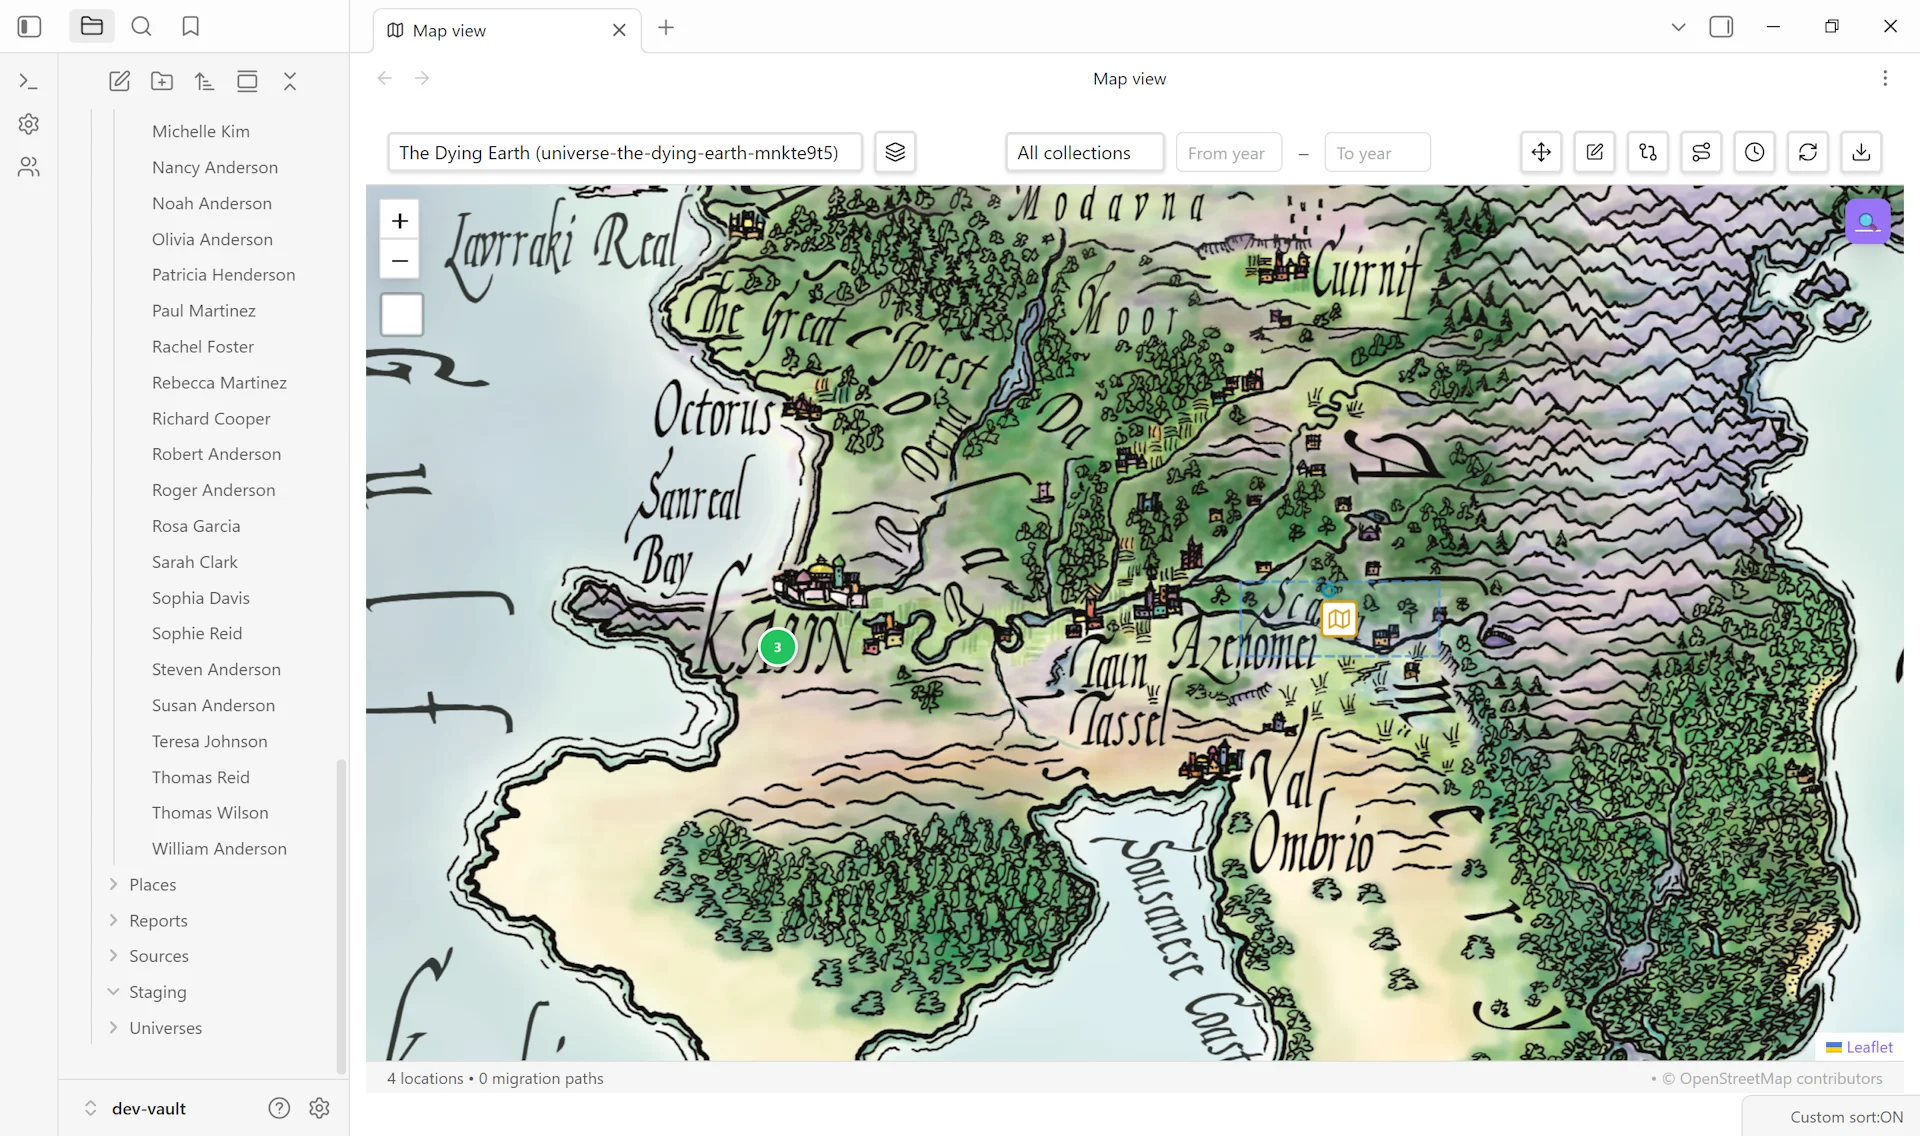
The map appears in Control Center → Maps with a thumbnail. Click the thumbnail to open it in Map View — your image renders as the basemap, and any places you placed appear as markers.
Variations#
- Align a hand-drawn map. Hand-drawn maps rarely match a coordinate grid out of the box. In Map View → toolbar → Edit → drag the four corner handles to reposition / scale / skew the image until landmarks align. Save when satisfied. Alignment is stored as
corner_*properties in the map note’s frontmatter, so the alignment persists across sessions. - Pixel coordinates for hand-drawn maps. When using Pixel as the coordinate system, places need
pixel_xandpixel_yproperties (instead of geographic coordinates). The Create Place modal doesn’t have pixel fields yet — add them manually to the place note’s frontmatter. To find pixel positions, hover over the location in any image viewer and read the X/Y values (origin is top-left). - Drilldown maps for regions. If your continent map needs a detail-level regional map, a dedicated drilldown-maps guide is queued. Quick version: create both maps, set
parent_map: <continent-map-id>on the regional map’s frontmatter, and the parent map gains a clickable marker leading to the regional map. - Simple creation (no wizard). Maps tab → Custom Maps card → overflow menu (⋮) → Create map (simple). Faster path if you don’t need the marker-placement step. Skips wizard navigation; directly opens the configuration form.
- JSON import. If you have a map configuration exported from another vault (overflow menu → Export to JSON), use Import JSON in the Custom Maps card. Useful for sharing custom maps between vaults or backing up complex map configurations.
Related guides#
- I want to create a fictional universe — recommended prerequisite for universe-scoped maps
- I want to link drilldown maps for regions (coming soon)
- I want to align a hand-drawn map to coordinates (coming soon)
- I want to build a family tree for fictional characters
Reference#
- Wiki: Custom Maps
- Wiki: Geographic Features
- Wiki: Universe Notes
Found something wrong or unclear? Suggest an edit — opens a pre-filled issue with the guides label.