Use this when your custom map image doesn’t match a coordinate grid out of the box — typical for hand-drawn fantasy maps, scanned historical maps, or composite images assembled from multiple sources. By the end your map will be positioned and scaled so place markers land where they should, with the alignment persisted across sessions.
What you’ll need#
- A custom map already created. See I want to create a custom map of my fictional world.
- An idea of which features on your map should anchor the alignment — landmarks, coastlines, rivers, or known cities are the usual reference points.
- (Recommended) Target coordinates for at least two reference points so you can verify the alignment.
Steps#
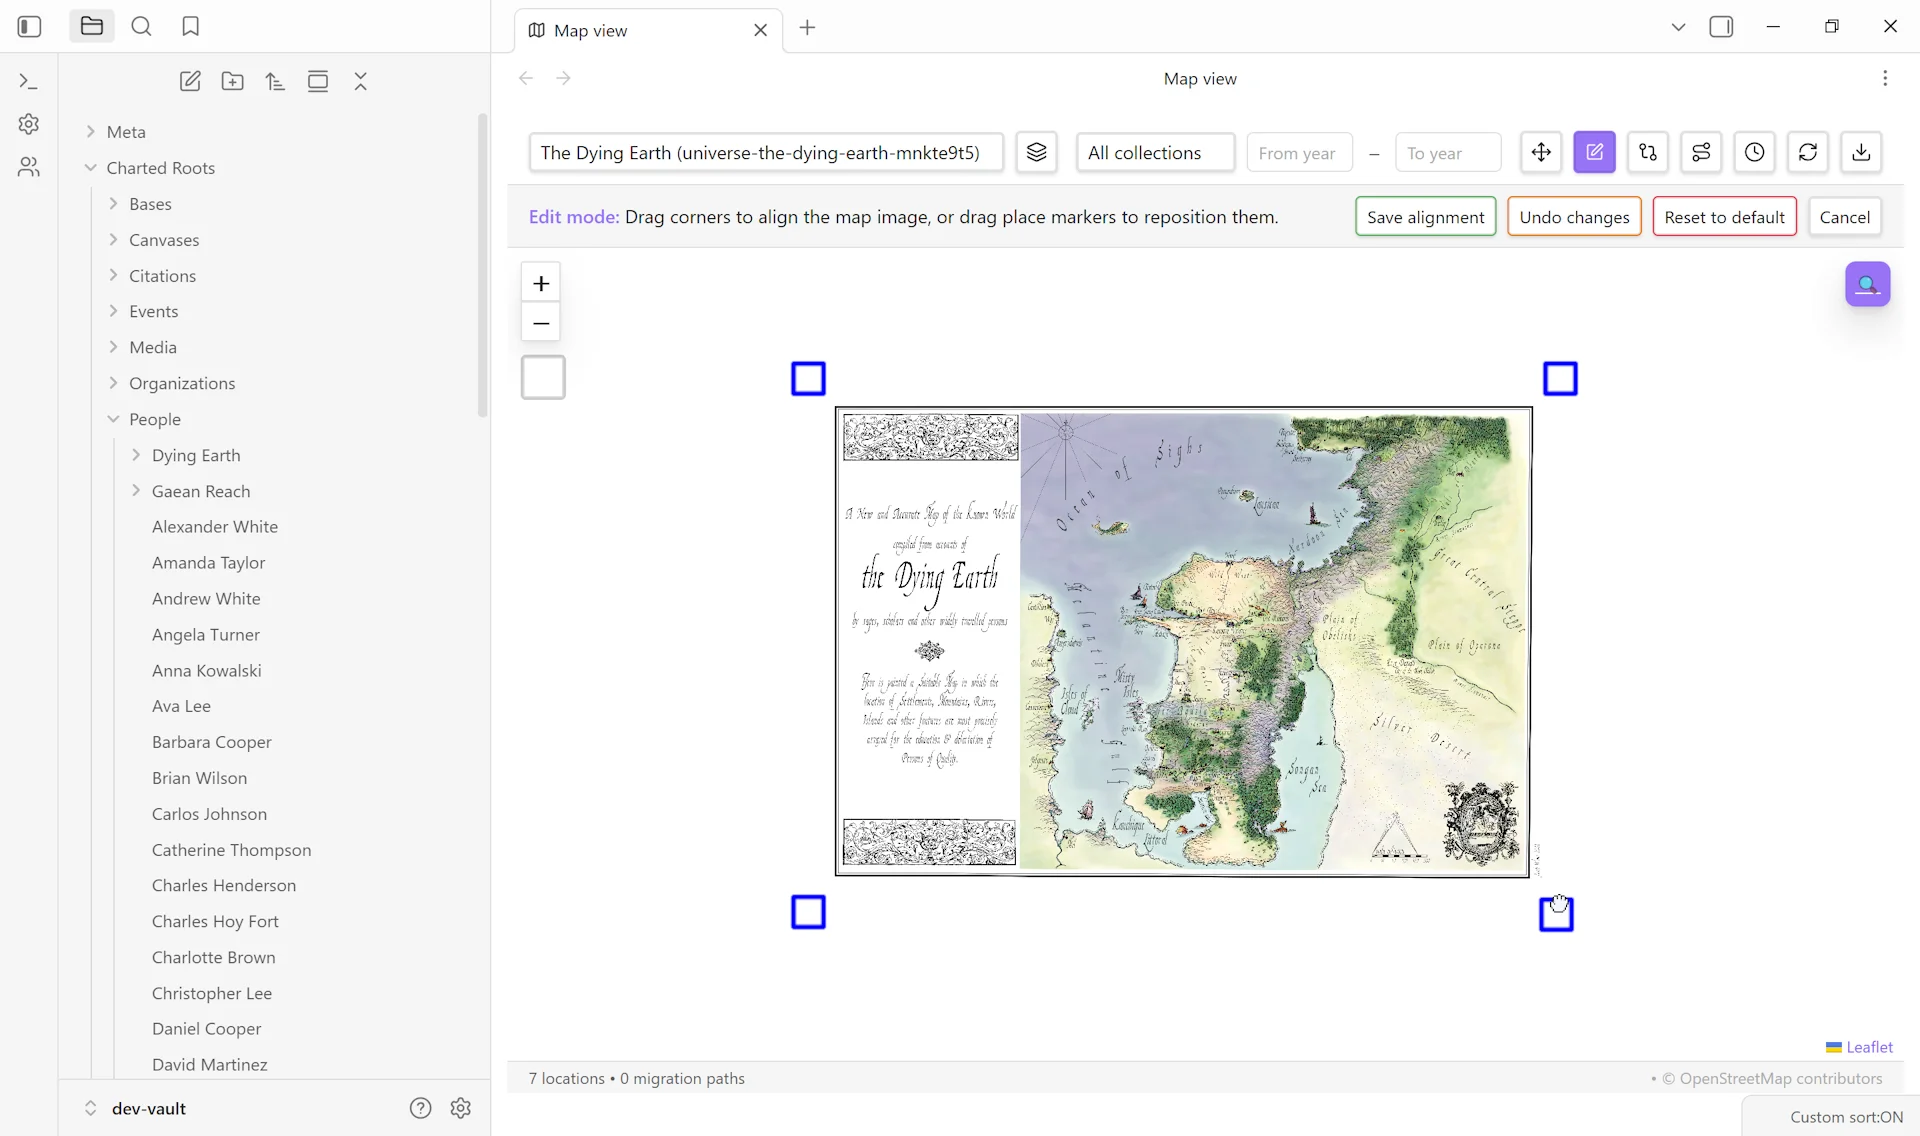
1. Open the map in Map View#
Open Map View from the ribbon, command palette (Charted Roots: Open map view), or the Maps tab in Control Center. Use the Map dropdown in the toolbar to select your custom map (not OpenStreetMap).
2. Enter edit mode#
Click Edit in the toolbar. An edit banner appears with alignment controls, and four corner handles appear at the corners of your map image.
3. Adjust the corners#
Each handle moves independently:
- Drag a single corner to reposition that corner.
- Drag opposite corners apart (e.g., NW and SE) to scale the image.
- Drag adjacent corners (e.g., NE and SE) to rotate or skew that edge.
The image updates in real-time as you drag. Start with rough positioning of one corner, then work around the map adjusting the others.
4. Verify with a test marker#
Add a test place at a location whose target coordinates you know (or use an existing place). Confirm the marker lands where it should. Adjust corners further if it’s off — small iterative changes work better than large jumps.
5. Save alignment#
Click Save alignment in the edit banner. The corner positions are written to the map note’s frontmatter as corner_nw_lat, corner_nw_lng, corner_ne_lat, corner_ne_lng, corner_sw_*, corner_se_* — six pairs total. The map will load with this alignment in future sessions.
Variations#
- Iterating across sessions. The alignment auto-loads from the saved corner properties, so closing and reopening the map preserves your work. You can re-enter edit mode any time to refine.
- Resetting to default. In the edit banner, click Reset to default to clear all alignment and return to rectangular bounds. Useful if the alignment goes badly off and you want to start clean.
- Discarding unsaved edits. Click Undo changes to revert to the last saved position without leaving edit mode. Cancel exits edit mode without saving.
- Cropping vs. aligning. This guide covers alignment, not cropping. If your map image has wide margins or unwanted areas, edit the source image before importing rather than trying to crop in edit mode.
- Multiple reference points. The four-corner handle approach is a perspective-warp model. For maps where you have many reference points (e.g., a historical map with 20 known cities), consider re-projecting the source image in a GIS tool first, then importing the corrected version.
Related guides#
- I want to create a custom map of my fictional world — prerequisite
- I want to link drilldown maps for regions — pairs naturally with alignment for multi-scale worlds
- I want to create a fictional universe
Reference#
Found something wrong or unclear? Suggest an edit — opens a pre-filled issue with the guides label.